How to Clean a Tissue Processor
How to Clean a Tissue Processor
Introduction
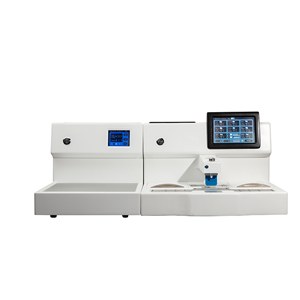
A tissue processor is an essential piece of equipment in laboratories and medical facilities, responsible for the precise and efficient processing of tissue specimens for histological examination. To ensure accurate results and the longevity of the equipment, it is crucial to maintain a clean tissue processor. In this article, we will provide a step-by-step guide on how to clean a tissue processor.
Why Cleaning Is Important
Cleaning a tissue processor is vital for several reasons:
1. Contamination Prevention: Tissue processors are prone to contamination due to the biological materials they handle. A clean processor minimizes the risk of cross-contamination between samples.
2. Optimal Performance: Proper maintenance, including regular cleaning, ensures that the tissue processor functions at its best, guaranteeing reliable results.
3. Longevity: Cleaning and maintaining the tissue processor can extend its operational lifespan, saving time and resources on replacements.
Step-by-Step Guide on How to Clean a Tissue Processor
1. Safety Precautions: Before starting, ensure the tissue processor is turned off, unplugged, and cooled down to prevent any accidents.
2. Personal Protective Equipment (PPE): Wear appropriate PPE, such as lab coats, gloves, and safety goggles, to protect yourself from potential exposure to hazardous chemicals or biological materials.
3. Cleaning Supplies: Gather the necessary cleaning supplies, including:
a. Isopropyl alcohol or an approved disinfectant.
b. Lint-free, non-abrasive cloths.
c. Soft brushes for removing dust and debris.
d. Cleaning swabs for hard-to-reach areas.
4. Exterior Cleaning:
a. Wipe down the exterior surfaces of the tissue processor with a cloth dampened with isopropyl alcohol.
b. Pay special attention to buttons, handles, and touchscreens, ensuring they are thoroughly cleaned.
5. Chamber Cleaning:
a. Open the tissue processor chamber and carefully remove any used or expired reagents.
b. Clean the chamber with isopropyl alcohol and a lint-free cloth, paying attention to the interior surfaces.
c. Inspect the chamber for any residue or debris and remove it using a soft brush or swab.
6. Reagent Containers:
a. Empty and clean the reagent containers or replace them if necessary.
b. Ensure that there is no contamination inside the reagent containers, which could affect the tissue processing.
7. Filters and Ventilation:
a. Clean or replace the filters in the tissue processor to maintain proper ventilation.
b. Ensure that vents and airflow pathways are clear of obstructions.
8. Maintenance Records:
a. Keep a record of the cleaning date, any parts replaced, and any maintenance issues encountered.
b. Regularly inspect the tissue processor for wear and tear, and address any problems promptly.
Conclusion
Properly cleaning a tissue processor is essential for maintaining the quality of histological specimens, preventing contamination, and prolonging the equipment's lifespan. Following the steps outlined in this guide will ensure that your tissue processor remains in excellent working condition and produces reliable results for your research or diagnostic purposes. Always follow the manufacturer's instructions for cleaning and maintenance, and consider seeking professional assistance if you are unsure about any specific cleaning procedures.


